Tuesday, October 23, 2012

TARDIS!

A few months ago I decided to participate in my first Reddit Gift Exchange...books! I spent a lot of time trying to find something my match would like and sending it out...worrying that I had picked something she wouldn't like or already owned...and then waiting...and waiting...and waiting some more for my gift. Nothing ever came, and thus was I a touch unimpressed with my first experience of Reddit gifts.

Then in late September they posted an exchange that I just could NOT pass up. Doctor Who! I am a newly converted Whovian. I just started watching the "New" Who in July of this year...and I haven't stopped since. I enjoyed Christopher Eccleston's Ninth Doctor...I was enthralled with David Tennant as Ten...and I suppose I tolerate/enjoy Matt Smith as Eleven.

So when this exchange came up...I knew I wouldn't be able to restrain myself, despite my earlier disappointment.

I got my match selected some items for her and shipped them away, but I didn't want to get excited or anxious about my match because I didn't want to be let down again. I was looking at it as a nice thing to do for someone else and didn't worry about reciprocation this time.

There was absolutely NO need for me to be worried...my match was FABULOUS! He did some stalking (just a bit, it didn't take much) and found out that I used to have this tiny little miniscule baking blog with a lovely friend and from there he selected an item that I have wanted since I watched my first episode of Doctor Who - way back in July - a TARDIS Cookie Jar!
I've been lusting after this cookie jar, which lights up and has a sound effect when someone opens the lid, I just couldn't convince myself that it was okay to buy the thing for myself. It has been in my cart on Amazon and ThinkGeek on multiple occasions. What I am saying is I am delighted with your selection gift giver!

Then - on top of that fabulousness - he also threw in a version of Ten's Sonic Screwdriver!

Both of these lovely items actually arrived last Friday, but I wanted to wait to post until I could bake actual cookies to put in my cookie jar.
That is a small flashlight version of Ten's Sonic Screwdriver that I also received. Adorable!
The jar even lights up and makes the sound of the Tardis when you open and close the lid!

I took some time trying to decide what cookies to bake and settled on Mountain Mama Cooks Browned-Butter Chocolate Chip Cookies. After receiving my gift on Friday...taking a quick trip to Noblesville on Saturday to see Katie, Jason and Jonah...I finally had time to make them Sunday night.

Chocolate Chip Cookies

Adapted from Cooks Illustrated

Ingredients:

1 3/4 cups flour

1/2 teaspoon baking soda

1/2 teaspoon salt

14 tablespoons butter

1/2 cup granulated sugar

3/4 cup packed brown sugar

1 tablespoon vanilla extract

1 large egg

1 large egg yolk

1 cup chocolate chips


Heat oven to 375F degrees. Whisk flour, baking soda and salt together in bowl; set aside. Heat the butter in a nonstick skillet over medium-high heat until melted, about 2 minutes. Continue cooking, swirling the pan constantly until butter is dark golden brown and has a nutty aroma, 1 to 3 minutes. Remove the skillet from heat and transfer butter to large heatproof bowl. Add both sugars and vanilla to bowl. Whisk until fully incorporated. Add egg and egg yolk and whisk until mixture is smooth and no lumps remain. Using a spatula, stir in flour mixture until just combined. Stir in chocolate chips and give the dough a final stir to ensure every thing is well mixed. Drop dough by the spoonful on a baking sheet lined with parchment paper (or greased) 2 inches apart. Bake cookies 10-11 minutes until cookies are still puffy and golden brown. Transfer cookies to cooling rack and cool completely.

The cookies were pretty delicious. They didn't spread nearly as much as I had feared they would...and they were just a touch crunchy on the outside but still chewy and delicious in the middle. For me they tasted like a really yummy version of a Tollhouse cookie. Very basic. But with just that little bit extra to make them totally worth being made from scratch. I will definitely make them again.

As for the cookies and the cookie jar? They didn't disappear into time and space, they made a trip to work, where I am sure my co-workers were pleased to see some baked goods out of me. (I haven't been bringing much in lately, due to making larger orders for other individuals and some serious back pain over the past few years. Also, I am poor.)

Rainbow Revisited

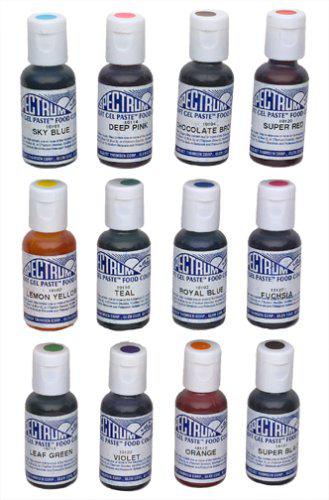
It was a busy couple months for first birthdays. After Jonah's birthday in August, a co-worker's granddaughter had her first birthday party in mid-October. She asked me if I would make some rainbow cakes and cupcakes in sticking with their loose theme of vibrant colors. She wanted 4 dozen cupcakes, a rainbow layer cake with a rainbow inside AND out and a smaller layer cake for the birthday girl to have to herself. I was a little concerned about getting the bright colors for both the cake and the frosting, but that is what she wanted, so that is what I did! After learning my lesson - and using most of my gel dye stash - for Jonah's cupcakes, I ordered the Ateco Spectrum Gel Paste Food Dye. It was cheaper to get the 12-pack on Amazon than to try to track down individual colors, so that is what I went with.
These were spectacular. I usually like Wilton products, but based on my rather limited experience I prefer these. They gel produced vibrant colors without having to use the entire bottle. I was also really pleased that the dye didn't alter the flavor of the buttercream that significantly. Bonus: The squeeze bottles were so much easier to use than the little pots that the Wilton's gel comes in and I didn't end up with dye all over my hands ands counter. Leery of the frosting not being vivid enough I prepared it the night before.
Of all of the colors. I will say I was most displeased with the red. It worked and I think I'm probably the only person who cared...but I have never found a red dye that I was happy with...this did come the closest though. The next day it was time for the batter. The recipe I decided to use was from Whisk Kid. I have lots of other white cake recipes I could have just colored, but I wanted to make sure the batter was sturdy enough to hold up in the thin layers, so I went with the recipe from someone who had previous success. If I was going to make this rainbow cake again just for a friend, it would have to be a GOOD friend, as this was a LOT of work, I would go with the white buttercream on the outside with the rainbow surprise!
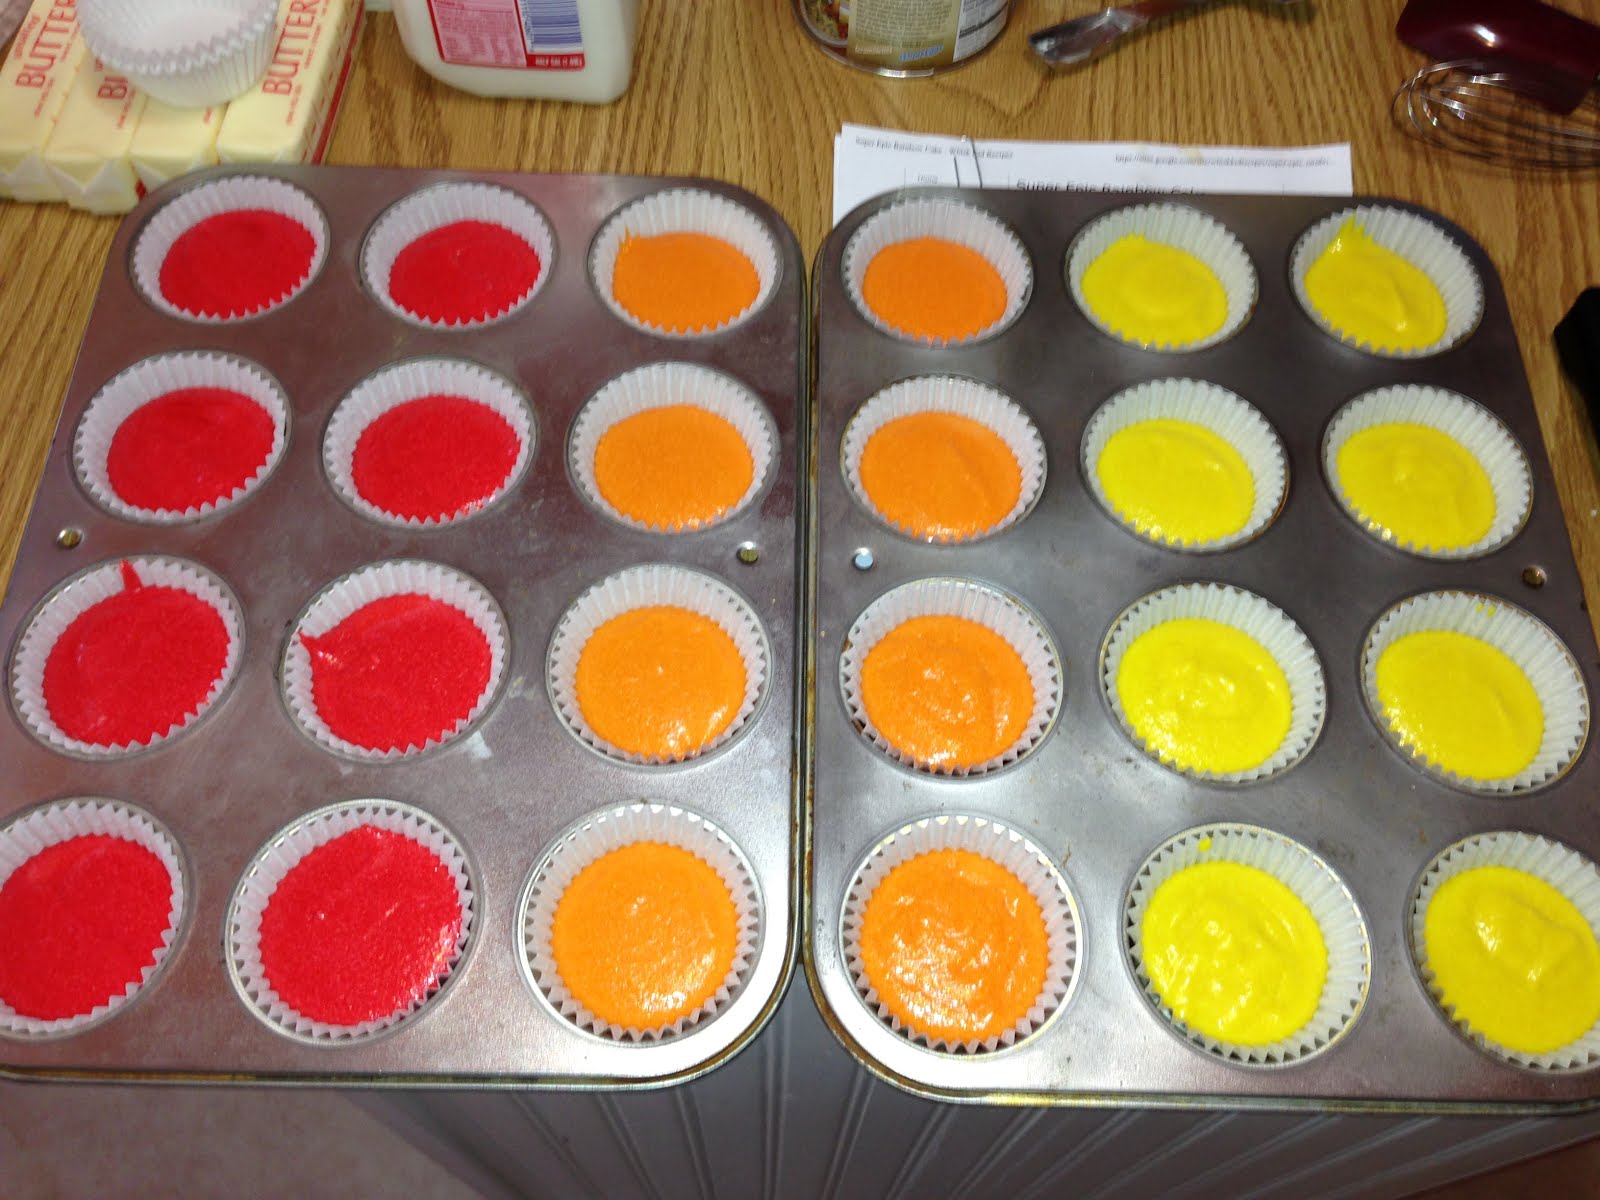
The cupcakes looked so pretty before going in to the oven!
And Just as pretty once they came out!
A swipe of vanilla buttercream and some coordinating sprinkles...and the cupcakes were done!
I didn't do much in the way of process for the cakes...but here is the inside...
...and the outside as was requested.
It was an interesting experience...and a far cry from our first attempts at rainbow baking back in 2008.

Monday, October 22, 2012

Jonah's Birthday

Warning: These pictures were taken with a iPhone 3G that was more than four years old. Don't judge.
So I've felt like a return to blog posts lately - if not a return to baking - although I am still doing a fair bit of that, just less often and in greater quantity. To start myself off I thought I'd post some pictures of something a little bit adorable that my dear friend Katie and I worked on for her son's first birthday back in August. Of course Jonah was the cutest thing around, but he isn't mine to post pictures of on the Internet, so I will refrain. Katie did a LOT of work for the little guy's first birthday party and her whole family chipped in to help with cleaning and decorating the house and feeding everyone at the party. I, however, am only going to show you what I had a tiny part in - the baked goods for the Sesame Street themed event.
• Chocolate and vanilla cupcakes with vanilla buttercream as Elmo, Cookie Monster and Oscar the Grouch. • Jonah's smash cake. • White chocolate dipped oreo pops. • Browned Butter Rice Krispie Treats (DELICIOUS!) Katie had picked out the cupcakes she liked the look of from some images online and was confident that with our powers combined we could manage to pull off some Sesame-Street-esque faces. I was not so sure and was hopeful that I could convince her to just let me pipe some brightly colored frosting...I failed. I still am not sure how I feel about the cupcakes as a whole, but I think you can probably tell who they are supposed to be.
Wehad a heck of a time getting Elmo's red frosting. It was pink for a very-very-very long time. Lesson learned, the frosting really does get darker as it sits...and sometimes Wilton Gel isn't the best option. Jonah's smash cake was just a three-layer 6-inch cake. I made up some marshmallow fondant with thoughts of doing something a little more detailed for his big day...but in the end time was not on my side and we went with simple instead with some brightly colored buttercream and his name cut out of white fondant. I tend to like simple anyway. I'm not sure how pleased Katie was with it though.
I'd post some recipes, but the chocolate cake was one that I actually posted on here years earlier. The buttercream was very basic. The vanilla wasn't amazing. Oreo pops don't really have a recipe. And the Browned Butter Rice Krispie Treats were entirely Katie's doing. (Did I mention those were delicious? Totally worth the effort Katie put in.)

Wednesday, March 28, 2012

Bacon Bluegrass Cupcakes

Soo....2 and a half years later...


As you may or may not know. I am a avid University of Kentucky basketball fan and when it comes to March Madness I can be a little bit ridiculous in both my fervor and my superstitious behavior.

Last Friday UK met up with the Indiana Hoosiers on their way to the Elite Eight. IU and UK have a pretty great traditional rivalry going on under regular circumstances and meeting up in the NCAA tournament after IU beat UK in the regular season on a last-minute shot took the rivalry to new heights.

To direct some of my nervous energy prior to the game I decided to make some kind of Kentucky cupcake. I'd seen some people making Kentucky Blue Velvet Cupcakes, but I'm just not a huge fan of any variety of velvet cupcakes. So I thought about what else Kentucky was known for...I didn't have to think very long...and came up with BOURBON! Yum!

After a few minutes scouring the Internet I settled on an amalgamation of a couple different recipes.

I went with the Chocolate-Bourbon Cupcake recipe from http://allisoneats.com. Which was an awesome decision. These cupcakes retained their bourbon flavor. WIN! They were also delicious and moist sans frosting. Right out of the oven these had a lovely almost caramelized top which had just a little bit of crunch to them. I've only made these once, so I don't know if that was a side affect of the liquor, or if I screwed up something about the recipe. Either way it turned out tasty.

1 cup bourbon
1 cup (2 sticks) unsalted butter
3/4 cup unsweetened cocoa powder (preferably Dutch-process)
2 cups all purpose flour
2 cups sugar
1 1/2 teaspoons baking soda
3/4 teaspoon salt
2 large eggs
2/3 cup sour cream

Preheat oven to 350 degrees. Line two muffin pans with paper liners.
Bring the bourbon and butter to a simmer in heavy large saucepan over medium heat. Add cocoa powder and whisk until mixture is smooth. Cool slightly.
Whisk flour, sugar, baking soda, and salt in large bowl to blend. Using electric mixer, beat eggs and sour cream in another large bowl to blend. Add bourbon-chocolate mixture to egg mixture and beat just to combine. Add flour mixture and beat briefly on slow speed. Using rubber spatula, fold batter until completely combined.
Fill cupcake liners 3/4 full (I just used an ice cream scoop and they turned out well) and bake 20-25 minutes (mine actually took a bit longer), until toothpick inserted into the center comes out clean.

For the frosting I started off with a Maple-Bourbon recipe from http://hauteapplepie.com.

1 stick butter, softened
8 oz. cream cheese
3-4 C powdered sugar
2 Tbsp good bourbon, such as Maker’s Mark
1/4 C real maple syrup OR 1/2 tsp maple extract
+ additional sifted flour as thickener

Beat butter and cream cheese until smooth. Beat in one cup of powdered sugar. Add bourbon and maple syrup and beat well. Beat in remaining powdered sugar. If frosting is not thick enough to your liking, beat in 1/4 C flour or additional sugar to thicken.

I ended up using additional flour, and a mixture of maple syrup and maple extract. As with most frosting I used the recipe as a jumping off point and went from there until I got something that I could pipe...and taste the way I wanted it too. The bourbon was also definitely present in this frosting too. I also wouldn't recommend the frosting for piping in any kind of warm temperature. It worked, but it was very very soft and if it had been warm or not it wouldn't have held its shape at all.

I topped it all off with some bacon bits. I baked the bacon in the oven which made it not to crunchy and not to underdone. It worked out really well. The salty bacon really tempered the incredibly sweet frosting. Or at least I thought so!

Sunday, August 2, 2009

Mickey Mouse Pancakes


If you know me, or if you've ever lived with me, or just spent the night at my house, you know how much I love love love breakfast! Hens in a Nest, french toast, omelets, pancakes, biscuits and gravy, muffins, bacon, bacon, and more bacon... what's not to love? I often find myself eating breakfast for dinner because I usually don't make much of a breakfast during the school week. I was especially excited on Father's Day because I was going to go to Fort Wayne, and my Nana was making breakfast for everyone. I knew this would involve my childhood favorite, Mickey Mouse pancakes. Sometimes just the head, other times the whole body, these were a staple of my childhood. I couldn't wait!

Then, it was all ruined. My brother's car got towed, and I don't have a car, so I was stuck in Indy. But, I still wanted my damn pancakes! Luckily for me, Joy the Baker (have I mentioned how much I love her?) posted her dad's recipe for buttermilk pancakes. I cut the recipe in half, and added more buttermilk so I could get a good Mickey shape. They were delicious! Not quite like Nana's, but yummy nonetheless. Now go make some pancakes!


Buttermilk Pancakes

Makes about 5 Mickey Mouse or 10 small pancakes

Ingredients:
  • 1/2 cup buttermilk
  • 1 egg
  • 1 Tablespoon vegetable oil
  • 1/2 stick unsalted butter, melted and cooled slightly
  • 3/4 cup all-purpose flour
  • 2 teaspoons baking powder
  • 2 teaspoons light brown sugar
  • 1/2 teaspoon salt
Directions:
Whisk together milk, eggs and vegetable oil in a medium bowl, then whisk in the butter.

Stir together flour, baking powder, sugar and salt in another medium bowl. Whisk in egg mixture until combined.

Once combined, let the batter sit for 10 minutes while griddle preheats.

Spray a griddle or skillet with nonstick vegetable spray over medium heat. Pour about 1/4 cup of batter onto skillet in a circle, then add two smaller circles for the ears. (You may need to add some more buttermilk if the batter is too thick to pour easily.) Cook until bubbles have formed on the top and sides of the pancakes and broken, about 2 minutes.


Flip pancakes with a spatula (a super thin metal spatula works great) and cook until undersides are golden, about 1 minute more. Lower heat if pancakes brown too quickly.


Serve with maple syrup. Don't forget the blueberries and bacon if you want to be super awesome like me!

Blueberry Oatmeal Muffins


Hullooooooo! (in that wonderful Julia Child/Mrs. Doubtfire sort of way)

Please forgive me for my extended absence. Yes, I know that it's been over a year since I last posted. Yes, I have baked a lot since then. Yes, I know that I am incredibly lazy and a procrastinator. But let's put that all behind us, and talk about some tasty muffins, mmkay?

I have been on a blueberry kick this summer. Hardly a day has gone by that I haven't had a blueberry in my fridge. Usually they just go in my yogurt or some pancakes (we'll get to that). But last time I went to the farmer's market, I bought an absurd amount. I was considering freezing them, but then I came across this recipe from Joy the Baker. It was truly destiny. I actually have buttermilk in my fridge, which I can never seem to use up before the expiration date. I had two little applesauce cups left to make one cup, and exactly half a cup of brown sugar. Perfect way to start a lazy Sunday, don't ya think?


Blueberry Oatmeal Muffins


Makes 12-15 muffins

Ingredients:
* 1 1/4 cups whole wheat flour (I used white whole wheat flour)
* 1 1/4 cups oats
* 1 tsp baking powder
* 1/2 tsp baking soda
* 1/4 tsp salt
* 1/2 tsp cinnamon
* 1 cup unsweetened applesauce (two of the snack pack size)
* 1/2 cup low-fat buttermilk
* 1/2 cup firmly packed brown sugar
* 2 tbsp canola oil
* 1 large egg, lightly beaten
* 3/4 cup blueberries (fresh or frozen)

Directions:
Preheat oven to 375 degrees.

Line a 12 cup muffin tin with paper cases or spray with nonstick cooking spray. I used the Crisco baking spray, which is great for muffins!

In a large bowl combine flour, oats, baking powder, baking soda, salt and cinnamon. In a medium bowl combine applesauce, buttermilk, sugar, oil and egg. Make a well in dry ingredients and add applesauce mixture. Stir until just moist. Fold in blueberries. Fill muffin cups 2/3 full. (I use a 1/4 cup measuring cup and it seems to fill them perfectly) If you have extra berries, it's always nice to put a few on top of the muffins.

Bake for 16-18 minutes, or until golden brown and delicious.

These go very well with a mug of coffee and Meet the Press, in my opinion.


Happy Sunday! :)

Saturday, November 1, 2008

A Halloween Wedding

Long, long ago, on a college campus far, far away, in Indianapolis, two freshmen at the University of Indianapolis decided to attend a "Christian" event (I can't remember the name of it, nor could I find it via google.) that allowed them to move on campus several days early. Woo!
Well not long into this event these two freshmen realized that both sarcasm and wit seemed to be wasted on the vast majority of people at this event. Thus, a bond occurred. The two freshmen were friends through all of the angst ridden drama that comes during the first year of college and some of it that comes from living in an all girls residence hall. Alas! At the end of their freshmen year, one of these two returned to Wisconsin while the other remained in Indiana.

And...roughly five years later, I finally made it to Wisconsin to see Nicki...for her wedding! on Halloween!


Meet the bride and groom: Nicki and Andy. They had a fabulous Halloween themed wedding, how could you do anything else for a wedding on Oct. 31. The seven hour drive was well worth it for me to finally meet Andy and to be there for their wedding. They had fabulous hand carved pumpkins lining the way into the reception. Each table had a Halloween centerpiece and the table numbers were small pumpkins with the number carved into them. The seat assignments were amazing toe tags hand made by Nicki. Not to mention all of the extra Halloween touches and the mini caskets filled with candy at each seat.

All of it was fabulous, but man you should have seen the cake they picked out, three layers, with each layer a different cake/filling combination. Yummmmmm...I was on my way out the door to head back to Indiana right while they were cutting the cake when Nicki's grandma brought me a piece of the delicious cake. She even psychically knew not to give me the cheesecake layer! I held off until about Chicago when I finally broke down and ate every delicious bite:-) Would you like to see the cake?


Isn't it pretty!? Just like them!

Thanks for inviting me Nicki, I was so happy to be there for your special day and to see how happy Andy makes you. The wedding was perfect. Right down to the sounds of trick-or-treating outside the church during the ceremony. Love you!

Saturday, October 18, 2008

Happy Birthday to Katie!

While Katie and Jason traveled to Ohio for a DEVO Concert/Obama Fundraiser I traveled to their house to let their dog out and to make some stealthy birthday baked goods. Yes, I baked in their kitchen while neither of them were home. I'm creepy like that.

First up I tried my hand at making my first ever apple pie. I cannot reveal the recipe as it is a shhhh! family secret of some sort that is not mine to reveal, but it is pretty freaking tasty, I can tell you that much. And, hey...not bad for my first attempt at from scratch pie.


Next up is one of the best things I have ever baked and one of the worst photos. When I was at Katie's I forgot to take a picture of the cake, so a week later we took this one, the cake had sank some while in the fridge and a week had not done much to improve its looks or probably its taste either.


The original recipe comes from Sky High: Irresistible Triple Layer Cakes, but I found it via Life in a Peanut Shell. The original recipe included a sour cream triple layer chocolate cake, peanut butter cream cheese frosting (don't judge until you have tried it..Yum.), and a chocolate-peanut butter glaze that I opted out of.


Sour Cream-Chocolate Cake with Peanut Butter Frosting
Sky High: Irresistible Triple-Layer Cakes

Makes an 8-inch triple-layer cake

Ingredients:
2 cups all-purpose flour
2 1/2 cups sugar
3/4 cup unsweetened cocoa powder, preferably Dutch process
2 teaspoons baking soda
1 teaspoon salt
1 cup neutral vegetable oil, such as canola, soybean or vegetable blend
1 cup sour cream
1 1/2 cups water
2 tablespoons distilled white vinegar
1 teaspoon vanilla extract
2 eggs

Directions:

1. Preheat the oven to 350 degrees F. Butter the bottoms and sides of three 8-inch round cake pans. Line the bottom of each pan with a round of parchment or waxed paper and butter the paper.

2. Sift the flour, sugar, cocoa powder, baking soda, and salt into a large bowl. Whisk to combine them well. Add the oil and sour cream and whisk to blend. Gradually beat in the water. Blend in the vinegar and vanilla. Whisk in the eggs and beat until well blended. Scrape down the sides of the bowl and be sure the batter is well mixed. Divide among the 3 prepared cake pans.

3. Bake for 30 to 35 minutes, or until a cake tester or wooden toothpick inserted in the center comes out almost clean. Let cool in the pans for about 20 minutes. Invert onto wire racks, carefully peel off the paper liners, and let cool completely. Then freeze for 15-20 minutes while you prepare the frosting.

4. To frost the cake, place one layer, flat side up, on a cake stand or large serving plate. Spread 2/3 cup cup of the Peanut Butter Frosting evenly over the top. Repeat with the next layer. Place the last layer on top and frost the top and sides of the cake with the remaining frosting.


Peanut Butter Frosting
Makes about 5 cups

10 ounces cream cheese, at room temperature
1 stick (4 ounces) unsalted butter, at room temperature
5 cups confectioners’ sugar, sifted
2/3 cup smooth peanut butter

1. In a large bowl with an electric mixer, beat the cream cheese and butter until light and fluffy. Gradually add the confectioners’ sugar 1 cup at a time, mixing thoroughly after each addition and scraping down the sides of the bowl often. Continue to beat on medium speed until light and fluffy, 3 to 4 minutes.

2. Add the peanut butter and beat until thoroughly blended.

The surprise didn't work out very well, but we did have a tasty if slow dinner with Katie, Rich, Rob, Susan, Jason, Tracy, Jillian and Allen and then cake and pie at Katie's. Mmm...pie.

Monday, September 15, 2008

Honey Chocolate Chip Cookies

Everywhere you look on baking blogs, websites, food shows and even in the New York Times, people are discussing and fighting over the best chocolate chip cookie recipe. I won't even begin to claim that I have found that. Opinions vary so much that it is an impossible statement. If Jillian shared her grandmother's chocolate chip cookie recipe, I'd be tempted to call it the best, but she hasn't and she won't, so I'm stuck with this one. Which, actually, I'm pretty okay with as it is freaking tasty and awesome. The honey really ads something to the flavor, even though I just used regular honey flavored honey as opposed to the floral stuff that everyone seems to favor. (Bleck!) I'm in love with honey just the way it is.


This recipe came from Baking Bites, another lovely blog with tons of recipes that you should definitely check out.

Ingredients:
Honeyed Chocolate Chip Cookies
1 cup butter, room temperature
1 cup brown sugar
1/4 cup white sugar
1/4 cup honey
2 large eggs
2 1/4 cups all purpose flour
1/2 tsp baking soda
1 tsp salt
2 cups chocolate chips

Directions:
Preheat oven to 325 degrees Farenheit. Line a baking sheet with parchment paper.
In a large bowl, cream together butter and sugars until light and fluffy. Beat in honey and both eggs, individually.
In a medium bowl, whisk together flour, baking soda and salt. On a low speed, gradually incorporate flour mixture into honey mixture. Stir in chocolate chips.
Use a small-ish scoop to create 1-inch balls and place onto prepared baking sheet, leaving about 2 inches between each cookie to allow for the dough to spread. (And, these do spread quite a bit, so err on the side of too much space.)
Bake for 12-15 minutes, until cookies are golden brown. Cool for 3-4 minutes on the baking sheet, then transfer to a wire rack to cool completely.

Makes about 4-dozen cookies

Saturday, September 13, 2008

Not So Outrageous Brownies

This was another one of those baked goods for the Longaberger ladies.
This trip was a whole lot of pain, not to mention the getting up at 4 a.m. post adventures in late night baking.
The recipe came from the Cookie Madness, a virtual treasure trove of cookie and brownie recipes. Most of the stuff I find there turn out pretty well. These, not so much. I don't know what is wrong with me, the texture turned out great, but I just didn't like the added flavor from the instant espresso powder. Of course, I hate coffee in general, so probably you shouldn't judge these based on me.
The Oreos tended towards disintegration, which I didn't appreciate, but the artificially based filling stood up to the test in the oven and was easily discernible in the brownies. I would probably make these again, forgoing the additional coffee flavor for an extra bit of vanilla.


Ingredients:


8 ounces unsalted butter
8 ounces plus 4 ounces semisweet chocolate chips (12 oz total)
3 ounces unsweetened chocolate
3 large eggs
1 tablespoon pure vanilla extract
1 cup plus 2 tablespoons granulated sugar
1/2 cup plus 2 tablespoon all-purpose flour
1 1/2 teaspoons baking powder
1/2 teaspoon salt
2 teaspoons instant espresso powder
8 Oreo cookies, broken up

Directions:
Preheat the oven to 350º. Line a 13×9 inch metal pan with foil and spray foil with cooking spray.

Melt the butter, 8 ounces semi-sweet chocolate chips and the unsweetened chocolate in a medium bowl over simmering water. Allow to cool slightly.

Stir (do not beat) eggs, vanilla, and sugar together in a large mixing bowl. Stir the warm chocolate mixture into the egg mixture and cool to room temperature.

Stir 1/2 cup of flour, the baking powder, salt and espresso powder together in another bowl then add to the cooled chocolate mixture. Toss the Oreo chunks and 4 ounces of chocolate chips in a medium bowl with remaining 2 tablespoon of flour, then add them to the chocolate batter. Pour into pan

Bake for 20 minutes, then rap the baking sheet against the oven shelf to force the air to escape from between the pan and the brownie dough. Bake for about 10 minutes more, or until a toothpick comes out clean. Do not overbake! Allow to cool, then chill brownies. Lift from pan and cut into squares.

Makes about 32 (Or so the recipe said, I ended up with maybe 20, but apparently I make my brownies overly large...it's how I like things.

Doughnut Muffins! = Delicious


Yum. Yum. Yummy. This are much easier than they sound, especially if you come up with a better way to dip them than by burning the tips of your fingers like I did. Robin took several young hoodlums to Longaberger Mecca, Dresden, Ohio, for a Saturday and I was urged to provide some baked sustenance for the arduous journey. I thought these sounded pretty good for a breakfasty type baked good. I chose to make mine into mini-muffins instead of full-sized, which ended up turning out really well, they tasted just like cinnamon sugar doughnut holes and they stayed really moist over the next few days.


Doughnut Muffins
Ingredients:
1/3 cup oil
1/2 cup sugar
1 egg
1 1/2 cups flour
2 tsp baking powder
1/2 tsp salt
1/4 teaspoon cinammon
1/4 teaspoon nutmeg
1/2 cup milk

Topping (I pretty much doubled this)
1/2 cup sugar
1/2 cup melted butter
1 teaspoon cinnamon

Directions:
Preheat oven to 350 degrees. Spray and flour a mini-muffin pan. Don't use paper liners.
Cream oil 1/2 cup sugar and egg in a medium bowl.
In a seperate small bowl mix flour, baking powder, salt, nutmeg and cinnamon together. Alternate adding the flour mixture and 1/2 cup milk to the cremed mixture. Flour-Milk-Flour-Milk-Flour. Spoon the batter into greased mini muffin tins about 1/2 full and bake for 12-15 minutes.
Melt the butter for the dipping mixture in a small bowl. Combine the sugar and cinnamon in another bowl. When the muffins are done remove them from the tin, and immediately dip them into the melted butter and then roll them in the cinnamon sugar mixture. Let rest on a cooling rack or some paper towels.

Monday, June 23, 2008

Coca-Cola Cake!


MMMMM......Cola Cake! If you have ever wondered before, this is my most favoritest cake. Or, if you are into grammar conventions, my absolute favorite. I don't remember a time when this hasn't been the cake I judge all other cakes against.
My grandmother used to make it almost every year for my birthday, but that was a long time ago. She passed away last year, but she had stopped baking or doing much of anything long before that. Several years ago, my friend Katie went to the effort of baking a coca cola cake for my birthday. It wasn't the prettiest (she didn't realize that they never are very attractive.) but it was delicious. The fact that she made the attempt is one of the many reasons that I love her dearly. Earlier this year, Mom #2 made one for me at work. It was fabulous, but it also made me realize something....at this point, shouldn't I be able to make my own freaking coca cola cake? I had been baking all of this stuff, and it never once occured to me that I should attempt it too.

I should forewarn you that this is the most horrible, bad for you cake around. If you aren't looking for that, don't read any further.


This particular recipe came from the Coke website.

The link connects to a list of coca cole related recipes. My favorite and the one pictured is the Coke Cake. Beware the listing for chocolate cola cake. It is a dirty liar and not nearly as tasty as this one.


Recipe
Cola Cake:
2 cups all purpose flour
2 cups sugar
1/2 cup butter
1/2 cup vegetable oil
3 tablespoons cocoa
1 cup Coca-Cola
1 teaspoon baking soda
1/2 cup buttermilk
1 1/2 cups miniature marshmallows
2 eggs, beaten
1 tsp vanilla extract

Frosting:
1/2 cup butter
3 tablespoon cocoa
6 tablespoons Coca-Cola
16 ounces = 1 box confectioner's sugar
1 cup chopped pecans
1 tsp vanilla extract

Sift together flour and sugar into large bowl. (I'm not sure how important the sifting bit is, I've always done it the way they recommend. I never want to chance messing up my cake.) Add marshamllows.

In a saucepan, mix butter, oil, cocoa and coca-cola. Bring to a boil. (I make sure to melt the butter a bit by itself first, things seem to go more smoothly that way.)

Pour the mixture over top the sugar/flour/marshmallows and blend well.

Dissolve baking soda in buttermilk just before adding it to the batter along with the eggs and vanilla extract.

Pour into a greased 9x13 jellyroll pan. Bake for 30-45 minutes.

While the cake is baking go ahead and prepare the frosting.


Combine buter, cocoa powder and coca cola in a saucepan. (Again I recomment melting the butter a bit first.) Bring to a boil and pour over confectioners' sugar and blend well. Add vanilla extract and crushed pecans.

ICE CAKE WHILE HOT! DIRECTLY OUT OF THE OVEN! (I am using capital letters, not because my caps lock key got stuck, but because this part is important!

ENJOY! (Obviously, this part is also vital.)

**I will also recommend using the 9x13 jelly roll sized pan listed in the recipe. The cake comes out thinner and better and that is, after all, the point. Also if you are a dirty rotten scoundrel like me, you might want to double the frosting recipe. You want to shoot for a roughly 50-50 ratio between cake and icing.**

Butterfinger Bars


It seems like a lifetime ago that I made these. So long ago, I don't even remember where the recipe came from or where it is just now. I remember that it was different from most "butterfinger" recipes in that it actually involved the use of butterfingers, not an attempt at replicating the taste itself. I'll go ahead and post the photos and then add the recipe once I find it.


If you care to take notice, these were baked in my fabulous "new" a.k.a. new to me pans. They are vintage and I didn't even have to go looking for them, just had to ask my grandma! I love the metal pans with the matching slide on lids. Grandma gave me two! :-)

Tuesday, June 3, 2008

Mom's Cherry Cordials

I too, am alive. I graduated a month ago, and let's just say I needed a short hiatus from just about everything. I did start baking again, but I just need to catch up on the blogs!


My Mom really loves cherry cordials. I buy some for her on almost every holiday that is appropriate. I decided that I would try making them myself this year. I personally like the look of the hand dipped candies versus the molded ones, so that's what I decided to make.

I always wondered how cherry cordials got their gooey center, and now I know! The center is actually a fondant that is wrapped around the cherry. After you coat it in chocolate and let it sit at room temperature for a few days, it liquefies.


Unfortunately, I was too afraid that the chocolate would melt, so I kept these in the fridge. The centers didn't liquefy, but they were still tasty!


I used the recipe found here. I made about 30 cherries (however many were in one jar), and I only used about half of the fondant. I also drizzled on some white and dark chocolate after I dipped them in the milk chocolate. It was hard to drizzle around the stem, but I still think they turned out nicely!

I gave a nice box to Mom and had some extras to share with the family. Everyone loved them! Even some people who haven't liked cherry cordials in the past enjoyed these! Mom especially loved them! She said they were "nummy" and "melted in her mouth." The only problem is that now she might be expecting them a lot more often!

Thursday, May 29, 2008

I'm Alive

I have done some baking since my last post, but my oven hasn't even been turned on in over a week. The weight loss from the lack of baked goods at work is astounding.
No excuses for a lack of oven adventures, but I've had a very insane week and a half. Dad had emergency open heart surgery to remove an anuerism on his aorta, repair an aortic disection and a double bypass and I spent most of my time driving back and forth from work to Jewish Hospital in Louisville, Ky. He is back at his home again and I just finished a large-ish/tedious special section at work so I should have some time again.

Angela has been in from her Peace Corps adventures so that has been great. Hopefully I'll get some time to do some baking for her before she leaves us again until December.

In other news:

Kristen Bell and Michael Ausiello Have My Vote for the

Sunday, May 11, 2008

Mother's Day: Dorie's Peanut Butter Torte

This was the second of the two Mother's Day desserts. Personally, I preferred the strawberry cake, but both of them ended up getting consumed, so I'll call it a wash.


Dorie Greenspan's Peanut Butter Torte
from "Baking, From My Home to Yours"

Ingredients:
1 ¼ c. finely chopped salted peanuts (for the filling, crunch and topping)
2 teaspoons sugar
½ teaspoon instant espresso powder (or finely ground instant coffee)
¼ teaspoon ground cinnamon
Pinch of freshly grated nutmeg
½ c. mini chocolate chips (or finely chopped semi sweet chocolate)
24 Oreo cookies, finely crumbed or ground in a food processor or blender
½ stick (4 tablespoons) unsalted butter, melted and cooled
Small pinch of salt
2 ½ c. heavy cream
1 ¼ c confectioners’ sugar, sifted
12 ounces cream cheese, at room temperature
1 ½ c salted peanut butter – crunchy or smooth (not natural; I use Skippy)
2 tablespoons whole milk
4 ounces bittersweet chocolate finely chopped


Directions:
Getting ready: center a rack in the oven and preheat the oven to 350°F. Butter a 9-inch Springform pan and place it on a baking sheet lined with parchment or a silicone mat.
Toss ½ cup of the chopped peanuts, the sugar, espresso powder, cinnamon, nutmeg and chocolate chops together in a small bowl. Set aside.

Put the Oreo crumbs, melted butter and salt in another small bowl and stir with a fork just until crumbs are moistened. Press the crumbs evenly over the bottom and up the sides of the spring form pan (they should go up about 2 inches on the sides). Freeze the crust for 10 minutes.
Bake the crust for 10 minutes, then transfer it to a rack and let it cool completely before filling.

Working with a stand mixer fitted with the whisk attachment or with a hand mixer in a large bowl, whip 2 cups of the cream until it holds medium peaks. Beat in ¼ cup of the confectioners’ sugar and whip until the cream holds medium-firm peaks. Crape the cream into a bowl and refrigerate until needed.

Wipe out (do not wash) the bowl, fit the stand mixer with the paddle attachment if you have one, or continue with the hand mixer, and beat the cream cheese with the remaining 1 cup confectioners’ sugar on medium speed until the cream cheese is satiny smooth. Beat in the peanut butter, ¼ cup of the chopped peanuts and the milk.
Using a large rubber spatula, gently stir in about one quarter of the whipped cream, just to lighten the mousse. Still working with the spatula, stir in the crunchy peanut mixture, then gingerly fold in the remaining whipped cream.Scrape the mouse into the crust, mounding and smoothing the top. Refrigerate for at least 4 hours, or overnight; cover with plastic wrap as soon as the mousse firms.

To Finish The Torte: put the chopped chocolate in a heatproof bowl and set the bowl over a saucepan of simmering water. Leave the bowl over the water just until the chocolate softens and starts to melt, about 3 minutes; remove the bowl from the saucepan.
Bring the remaining ½ cup cream to a full boil. Pour the cream over the chocolate and, working with a a rubber spatula, very gently stir together until the ganache is completely blended and glossy.
Pour the ganache over the torte, smoothing it with a metal icing spatula. Scatter the remaining ½ cup peanuts over the top and chill to set the topping, about 20 minutes.
When the ganache is firm, remove the sides of the Springform pan; I had no problems removing the pan, but you can also wrap a hot damp kitchen towel around the pan and leave it there for 10 seconds. Refrigerate until ready to serve. *I actually refrigerated mine in the springform pan because I was worried about something getting knocked into it while in the fridge. I didn't encounter any problems from that.


TORTE!

Mother's Day: Strawberry Cake From Scratch

For Mother's Day this year my family came over and we had a fabulous home cooked meal and enjoyed each other's company. EHHH! Wrong. My family came over and we all went to the local New China Buffet Restaurant. My family stuffed themselves and shamed me and then returned back to the apartment for the desserts I made the night before.

Awhile ago Katie was looking for a "from scratch" strawberry cake recipe for her brother's birthday. I don't remember what recipe she ended up using, I just remember she wasn't hugely pleased with it for the amount of work and pureeing that was required.

I did some searching and came up with this one to try from All Recipes. I've since made this cake three or four times and it has consistently turned out well. The icing is a little more iffy, but the cake has always been delicious and pretty.


From Scratch Strawberry Cake

Ingredients:
2 cups white sugar
1 (3 ounce) package strawberry flavored gelatin
1 cup butter, softened
4 eggs (room temperature)
2 3/4 cups sifted cake flour
2 1/2 teaspoons baking powder
1 cup whole milk, room temperature
1 tablespoon vanilla extract
1/2 cup strawberry puree, I used fresh, but the recipe originally called for frozen


Directions:
Preheat the oven to 350 degrees F (175 degrees C). Butter, flour and line with parchment three 9 inch round cake pans.
In a large bowl, cream together the butter, sugar and dry strawberry gelatin until light and fluffy. Beat in eggs one at a time, mixing well after each. Combine the flour and baking powder; stir into the batter alternately with the milk. Blend in vanilla and strawberry puree. Divide the batter evenly between the prepared pans.
Bake for 25 to 30 minutes in the preheated oven, or until a small knife inserted into the center of the cake comes out clean. Allow cakes to cool in their pans over a wire rack for at least 10 minutes, before tapping out to cool completely. These might benefit from a trip to the freezer as they tend to stick in the pan.

These tend to make three moist, dense layers. I've used both strawberry cream cheese and strawberry butter cream icing. The cream cheese just refused to hold up very well and ended up making a horrible layer cake. The buttercream is a touch sweet, but it works well and is easy to use. I just use a regular buttercream recipe adding in about a 1/4 to a 1/2 cup of extra strawberry puree.

Friday, May 2, 2008

Mexican Chocolate Crunch Brownies

Unless you are Jill, Richard, Heather, Hannah, Mark or my mother you probably don't know about my complete and total adoration for Cinnamon Toast Crunch. Cereal is hands down one of my favorite foods. I love all kinds from regular flakes to child pleasing Captain Crunch and more health focused raisin brain or frosted mini-wheats. Cereal. The delightful combination of milk with tasty bite sized morsels. I tend to go through phases with my cereal loves. The longest and most enduring infatuation has been above all, Cinnamon Toast Crunch. My love is what led me to jump on making these brownies from the Pillsbury 43rd Annual Bake Off. Mom was nice enough to get the little recipe booklet with all of the finalists in it for me. And this was one of the first I marked to try.


Ingredients:
1 box (12.8 oz) Cinnamon Toast Crunch® cereal (about 8 cups)
1/2 cup butter, melted
1 tbs corn syrup
1 box Fudge Brownie Mix
1/2 cup Vegetable Oil
1/4 cup water
2 eggs
1/2 tsp cinnamon
1 1/3 cups semisweet chocolate chips
3 tbs cinnamon-sugar


Directions:
Heat oven to 350°F. Spray 13x9-inch pan with baking spray. Crush cereal until finely crushed in food processor. You should have about 4 cups.
In large bowl, stir butter and corn syrup until well blended. Add crushed cereal; mix thoroughly. Press evenly in pan.
In large bowl, make brownie mix as directed on box, using oil, water and eggs as listed and adding cinnamon. Stir in 2/3 cup of the chocolate chips. Pour brownie batter over cereal mixture. Sprinkle remaining 2/3 cup chocolate chips evenly over batter.
Bake 20 minutes. Sprinkle cinnamon-sugar evenly over brownies.
Bake 14 to 18 minutes longer or until brownies are set when lightly touched in center. Cool 10 minutes; loosen edges but do not cut. Cool completely, about 2 hours before cutting.


I really liked these a lot. The one suggestion I would make is to bake the crust by itself for maybe 5-10 minutes before adding the brownie mix. The cereal crust ended up really chewy and although it tasted alright it's texture was unpleasant.

Wednesday, April 30, 2008

Margarita Cupcakes

What do I hate? TEQUILA! So what am I gonna do? Bake with it!!!

Sounds logical to me. Baking makes all flavors better right? And it is less likely that I 'll go swimming fully clothed in Canaan after eating a cupcake.

Actually, Robin needed something to take with her to the end of the season bowling shindig. And what better to take to a bunch of booze loving ladies than a liquor soaked baked good?


Ingredients
Margarita Cupcakes:
9 oz Margarita mix
3 oz tequila
3/4 oz Grand Marnier (I used Triple Sec)
White Cake Mix - GASP! (No-pudding mix works best)
3 egg whites
2 tbs vegetable oil
1 tbs lime zest

Lime Buttercream:
4 cups powdered sugar
1/2 cup unsalted butter, at room temperature
1/8 tsp salt
3 tbs lime juice
Food Color


Directions
Cupcakes:
Mix together the margarita mix, tequila, and Grand Marnier (Triple Sec) in a large glass or spouted bowl. You actually only need 1 1/4 cup of this for the cupcake mix. Put the remainder in the fridge to chill and then use how you see fit.

In a stand mixer, add the cake mix, egg whites, vegetable oil, lime zest, and 1 1/4 cup of the margarita mixture. Mix on low for about 30 seconds and then increase to medium speed for two minutes (the batter will still be a bit lumpy).

Spoon the batter into a prepared muffin pan (fill the cups somewhere between 2/3 and 3/4 full) and bake at 350 for about 25 minutes or until a toothpick comes out clean. Remove the pan from the oven and cool 5 minutes before removing to a cooling rack.

Icing:
Add the butter, powdered sugar, salt, food coloring, and lime juice to the stand mixer and mix on low using the paddle attachment until combined. Turn the speed to med-high until the icing is fluffy. Add the icing to a pastry bag or use a spatula/knife to frost the cupcakes.


You will have to track down some who actually ate one of these get a review. I tried one and didn't really like the texture and I was a bit disappointed with the lack of margarita flavor in the cupcakes, it seemed to all be in the frosting.

Tuesday, April 29, 2008

Chocolate Pepper Cookies

Wow. I'm not sure who the target audience is for these cookies, but it certainly wasn't me or anyone else I could sucker in to trying one. Oh wait! My grandmother, the one, who can't drink coffee after 4 p.m. liked the pepper cookies.


Chocolate Pepper Cookies
The recipe here from Cookie Madness.

Ingredients:
1 cup all purpose flour
1/3 cup dark cocoa powder (Dutch Process) (1 oz)
1/2 teaspoon coarse black pepper
1/2 teaspoon baking powder
1/2 teaspoon baking soda
1/4 scant teaspoon salt
6 tablespoons sugar
2 tbs golden syrup/white corn syrup
1/3 scant cup vegetable oil
½ tsp vanilla
3 1/2 tbs water
1/4 cup chopped up dark chocolate


Directions:
350 degrees F

Stir together the flour, cocoa powder, black pepper, baking powder, baking soda, and salt. In a separate bowl, mix together the sugar, syrup, oil, vanilla and water.

Add the dry mixture to the wet mixture and stir until almost mixed, then add chocolate and stir until flour mixture is fully absorbed and chocolate is distributed.

Drop by rounded teaspoonfuls onto an ungreased cookie sheet. Bake for 12 minutes.

This recipe yields between 12-18 cookies and trust me, that will be plenty.


I used less than half of the pepper called for and these were still tooo peppery for me. Seriously spicier than I have ever known that simple black pepper could be.
Give them a shot if you would like. I'm sure they are someone's cup of tea. The texture and actual composition of the cookie was god, so if you can get on board with the flavor, they would be tasty I'm sure.